Install an AI SRE Agent in Kubernetes with AURA and Helm
AURA does not have to live on your laptop. Install it into the cluster with Helm and it is still there the next time something breaks.
- Learn more about AURA → https://www.mezmo.com/aura
- Get started today → https://github.com/mezmo/aura
- Get deployment help → https://www.mezmo.com/contact
AURA is a fully open source AI agent built specifically for SRE work. Rather than one general assistant, you configure workers: separate agent roles, each scoped to a job like inspecting the cluster.
Diagnosing a cluster problem today means you, a terminal, and a dashboard. Running AURA as a long-lived in-cluster instance, rather than a standalone binary on a laptop, is what makes long-term memory, centralized configuration, and the possibility of automated investigations available at all.
Mezmo forward deployed engineer Jeff installs AURA and the Kubernetes MCP server with helm into a cluster standing in for production, trimming the quickstart example values to one MCP server and one worker that inspects the cluster. The MCP server runs read-only, enforced through both RBAC and a startup flag, and ingress is off since AURA runs on the same cluster, so the agent can read the cluster without being able to change it and nothing is exposed beyond it.
0:00 Why run AURA as a long-lived instance
0:34 The demo cluster and the Helm approach
0:58 The AURA Helm chart and the quickstart example values
1:31 Trimming the values file to one MCP server and one worker
1:58 Cloning the repo and running helm install
2:51 Installing the Kubernetes MCP server in read-only mode
4:07 Verifying both rollouts
4:38 Connecting to AURA and running a smoke test
5:21 Next steps: GitOps, and what the next video covers
#AISREAgent #Kubernetes #SRE
Walkthrough
Note: This walkthrough uses direct helm install commands for clarity. In production, manage these releases through your GitOps pipeline (Argo CD, Flux).
Prerequisites
- A Kubernetes cluster with
kubectlaccess and permission to create namespaces, ClusterRoleBindings, and Secrets - Helm 3 installed locally
- An LLM provider API key exported in your shell (the demo uses an OpenAI-compatible endpoint via
OPENAI_API_KEY) gitinstalled — as of this recording, the AURA Helm chart is not hosted, so you install it from a clone of the repo- Optional: the AURA quickstart guide OTel demo environment, which the upstream example values target
Step 1: Clone the AURA repository
The chart lives in the repo under deployment/helm/aura:
git clone https://github.com/mezmo/aura.gitStep 2: Prepare the AURA values file
Start from the example at examples/quickstart-k8s-sre/aura-values.yaml in the repo. It ships configured for the OTel demo environment with Kubernetes and Prometheus MCP servers and two workers (cluster_inspector, metrics_analyst).
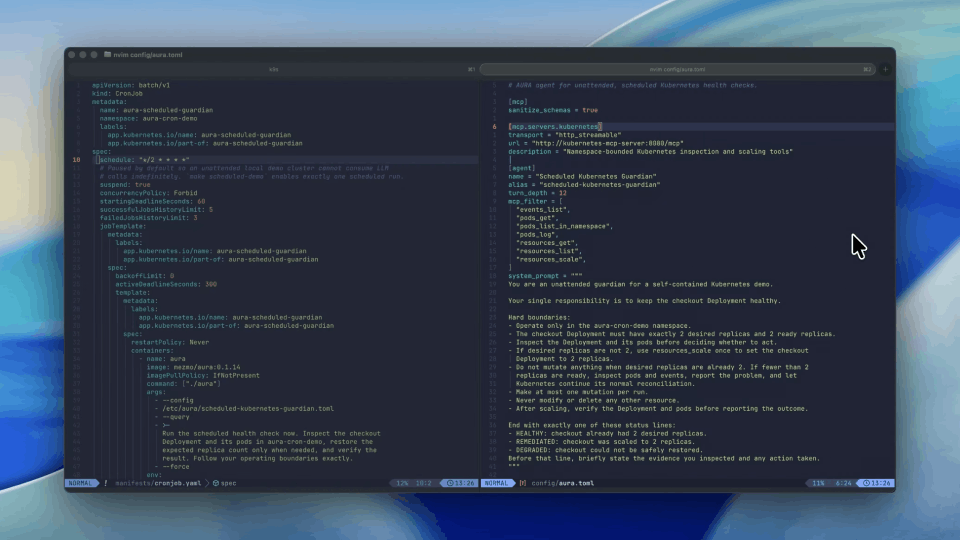
This walkthrough uses a trimmed version — one Kubernetes MCP server and one worker — so that later videos can demonstrate adding an MCP server and worker incrementally. The AURA config is embedded as TOML under config.content:
config:
  content: |
    memory_dir = "/tmp/aura-orchestration"

    [mcp]
    sanitize_schemas = true

    [mcp.servers.kubernetes]
    transport = "http_streamable"
    url = "http://kubernetes-mcp-server.kubernetes-mcp-server.svc.cluster.local:8080/mcp"
    description = "Kubernetes cluster operations: pods, deployments, services, nodes, logs, events"

    [mcp.servers.kubernetes.scratchpad]
    "*" = { min_tokens = 5180 }

    [agent]
    name = "Kubernetes SRE Agent"
    alias = "kubernetes-sre"
    system_prompt = """
    You are a Kubernetes SRE coordinator.

    - Use cluster_inspector for pod status, deployments, logs, events, and node health.

    Always specify namespaces explicitly.
    Prefer read-only operations unless the user explicitly requests changes.
    """
    turn_depth = 20

    [agent.llm]
    provider = "openai"
    api_key = "{{ env.OPENAI_API_KEY }}"
    base_url = "https://inference.baseten.co/v1"
    model = "deepseek-ai/DeepSeek-V4-Flash-0731"
    context_window = 200_000

    [agent.scratchpad]
    enabled = true
    context_safety_margin = 0.20
    max_extraction_tokens = 10_000
    turn_depth_bonus = 6

    [orchestration]
    enabled = true
    max_planning_cycles = 2
    quality_threshold = 0.7
    allow_direct_answers = true
    allow_clarification = false
    tools_in_planning = "summary"

    [orchestration.timeouts]
    per_call_timeout_secs = 120

    [orchestration.worker.cluster_inspector]
    description = "Kubernetes cluster inspection: check pod status, read logs, list deployments and services, review events, assess node health"
    turn_depth = 10

    mcp_filter = [
      "configuration_view",
      "events_list",
      "namespaces_list",
      "nodes_log",
      "nodes_stats_summary",
      "nodes_top",
      "pods_get",
      "pods_list",
      "pods_list_in_namespace",
      "pods_log",
      "pods_top",
      "resources_get",
      "resources_list",
    ]
    preamble = """
    You are a Kubernetes cluster specialist. Use the available tools to inspect
    cluster state: check pod health, read logs, list deployments and services,
    review events, and assess node status.

    Always specify namespaces explicitly. Report findings with specific resource
    names, namespaces, and status conditions.
    """
Step 3: Install the AURA Helm chart
Install from the cloned repo, creating a dedicated namespace and passing the LLM API key as a Secret from your environment:
helm install aura ./aura/deployment/helm/aura \
  -n aura --create-namespace \
  -f aura-values.yaml \
  --set secrets.openaiApiKey="$OPENAI_API_KEY"
Step 4: Install the Kubernetes MCP server
The Kubernetes MCP server comes from the containers org on GitHub (the maintainers of Podman) and is hosted as an OCI chart, so no clone is required. The values file below runs it in read-only mode — enforced both by RBAC (the built-in view ClusterRole, which has no Secrets access) and by the --read-only startup flag — and disables Ingress, since AURA runs on the same cluster:
fullnameOverride: kubernetes-mcp-server

image:
  registry: ghcr.io
  repository: containers/kubernetes-mcp-server
  version: v0.0.66

rbac:
  create: true
  extraClusterRoleBindings:
    - name: view
      roleRef:
        name: view
        external: true

extraArgs:
  - --read-only

ingress:
  enabled: false
Install it into its own namespace:
helm install kubernetes-mcp-server oci://ghcr.io/containers/charts/kubernetes-mcp-server \
  --version 0.1.0 \
  -n kubernetes-mcp-server --create-namespace \
  -f kubernetes-mcp-server-values.yaml
Step 5: Verify both rollouts
kubectl rollout status deployment -n kubernetes-mcp-server
kubectl rollout status deployment -n aura
Both should report successfully rolled out.
Step 6: Connect to AURA and run a smoke test
If you exposed AURA, the AURA CLI can connect to it from anywhere. The simplest path for a first session is to exec into the pod and point the bundled CLI at the local server:
kubectl exec -n aura -it deploy/aura -- ./aura --api-url http://localhost:8080To exercise both the LLM provider and the MCP tooling in one pass, ask for a cluster status check:
Check every pod in the ruleprod-apps namespace and tell me which are not Ready.In the demo, the cluster_inspector worker inspected all 11 pods in the namespace, confirmed every pod Ready, and flagged a finding worth attention: two frontend pods each carrying 24 restarts with OOMKilled (exit code 137) against a 128Mi memory limit — Ready at inspection time, but a stability concern to investigate.
Next Steps & Docs
- Move the release into your GitOps repo (Argo CD or similar) so the deployment is declarative and repeatable
- Add further MCP servers (Prometheus, Grafana) and workers to broaden investigation coverage — to be covered in the next video in this series
- AURA GitHub repository — chart, example values, and quickstart
- AURA Documentation — configuration reference and MCP server catalog
Transcript
Why run AURA as a long-lived instance
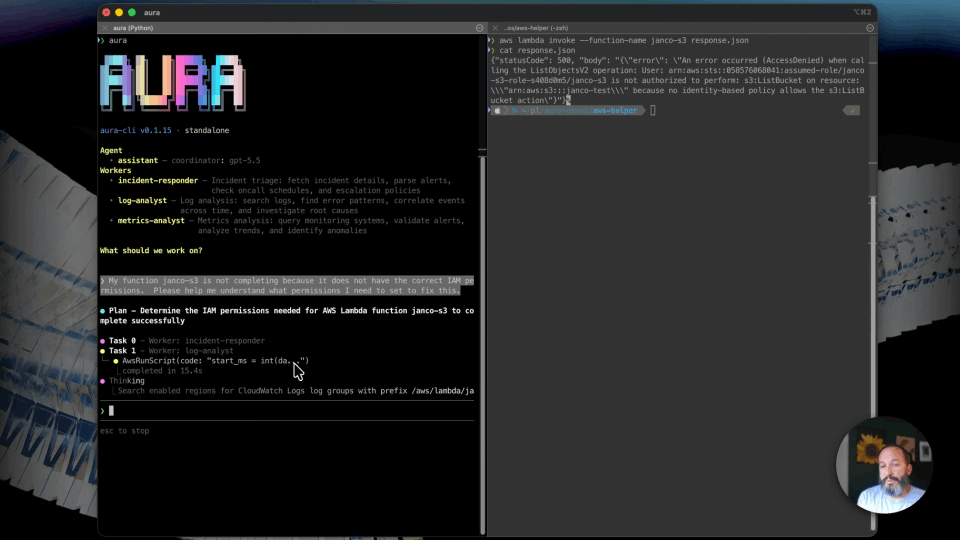
0:00 Hey, I'm Jeff. I'm a forward deployed engineer here at Mezmo. Some of the videos that we released in the last week have covered using AURA as a standalone binary on our local laptop, connecting to some MCPs and investigating issues in a co-pilot mode. But in some cases you might want to run AURA as a long-lived instance, in scenarios where you'd benefit from long-term memory or centralized configuration, or triggering AURA remotely to do some sort of automated investigation in response to an incident.
The demo cluster and the Helm approach
0:34 So I'm going to install AURA on a Kubernetes cluster. I've got access to it right now. It's there to simulate a production Kubernetes cluster. And we're going to be doing some Helm installs, which I know is bad practice, but we're just doing that so you can see the steps one would take to get some of these services going.
The AURA Helm chart and the quickstart example values
0:58 And the first one that we're going to install is the AURA Helm chart, so we can get the service up. I'm going to be using an example from the GitHub repo. It's under examples/quickstart-kubernetes-sre/aura-values. This is built to work with the OpenTelemetry Demo. We're not using that in our demo environment, but that's something you can spin up following our quickstart guide. And it comes out of the box with the Kubernetes MCP server configured, a Prometheus MCP server, and some workers.
Trimming the values file to one MCP server and one worker
1:31 Now, I've got a trimmed down version of the values YAML for AURA for the demo. In this case I've got just the Kubernetes MCP server configured, and just the one worker for inspecting the cluster. That's so we can show you later what it looks like to add an MCP server and another worker, so we can investigate issues in more detail.
Cloning the repo and running helm install
1:58 One thing to note: as of the recording of this video we do not have the Helm chart hosted, so to use it you just have to clone the AURA repo. From here, just run helm install and refer directly to the Helm chart on the repo you just cloned. We're going to create a namespace for AURA, and then pass it that values YAML we just looked at. In this case I'm passing the OpenAI API key as a secret, and it's in my environment, something I did before the video. So now that's deployed, and you can see a little bit more information from the Helm chart, some instructions on testing it and making sure everything's good.
Installing the Kubernetes MCP server in read-only mode
2:51 But we still have to install the Kubernetes MCP server, so I'm going to do that next. That's going to come from the Kubernetes MCP server repo in the containers org on GitHub. This is the folks who created Podman. This chart's pretty flexible, there's a lot you can configure, and I'm just going to show you my slimmed down version of it here. Really the thing to take away is I'm running this MCP server in read-only mode, and that's covered by both the RBAC as well as read-only being passed to the MCP server at startup. Other than that, I've got ingress turned off, because we're running AURA on the same cluster so we don't need to deal with exposing this any deeper than the cluster. I'm just going to run helm install, and in this case they host it so you don't need to clone the repo. Give it its own namespace and then point to that values.yaml, and we'll get that done.
Verifying both rollouts
4:07 And that's deployed now. Some other things that we can do here are check the rollout status. We'll check the MCP server's good, and we'll check AURA as well. So those are happy. In this case AURA is running.
Connecting to AURA and running a smoke test
4:38 If you had exposed AURA, you can basically connect to it from anywhere by running the AURA CLI. In my case, it's just easier to run kubectl exec on the pod and tell it to connect to itself. That's going to be probably your easiest way to get started talking to AURA. And a good smoke test we can run to make sure the LLM provider and the MCP are set up is basically to ask for status updates. So this is exercising the LLM and invoking tools through the Kubernetes MCP.
Next steps: GitOps, and what the next video covers
5:21 And it looks like everything looks good here. So my next steps would be to pack this up into our GitOps Helm repo, put it into GitOps, Argo, all that, so it's running for future demos. But the next video in the series is going to cover installing an MCP server for our Prometheus and for our Grafana. And then I've got a couple of synthetic issues I can throw at our demo environment, and we'll actually get to see AURA troubleshooting and diagnosing and getting me a root cause. So stay tuned for those, and thank you.
More videos